Introduction
A variety of filters are available for use with your telescope. These often have encouraging names such as “light pollution filter”, and many have rather deceptive advertising, implying they will produce amazing results.
Some may also include frightening language implying you need them for safety – such as the “moon filter” that protects your eyes from the terrifyingly-bright light of the moon. (In the case of solar filters, for observing the sun, the danger is real. But, unfortunately, there is one type of solar filter often supplied with beginner-class telescopes that is very dangerous. Beginners should leave solar observing for later, when they are more experienced, and when they have learned what kind of solar filtering is truly safe.)
Many beginners buy filters expecting miraculous improvements, then are disappointed. Filters do work, but the effect of most is subtle. Many are not worth it, while some are very effective but only for specific uses.
Note: This article is about visual filters – filters that you screw into the back of an eyepiece and use while observing through that eyepiece. Filters used with a camera for astrophotography are a different matter, and those are covered in a different series of articles.
What all filters do
 Visual filters are circles of glass, coloured or coated with special chemical films, that are screwed into the back of an eyepiece.
All filters work by removing or reducing some of the incoming light, and the idea is to select one that removes light you don’t want, leaving the light that you do want undisturbed. This makes the thing you are trying to observe stand out slightly better against the unwanted other light.
No filter makes any part of your view brighter. (How could it? Where would the energy come from to brighten some of the incoming light?)
In fact, filters will even make your desired target slightly dimmer. They work, when they work, by darkening the unwanted light much more than they darken your target.
Neutral-density “Moon” filters
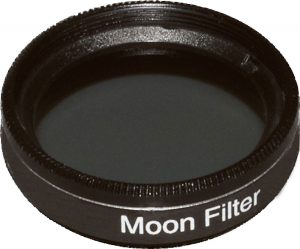 Moon filters are neutral-density filters, reducing the intensity of the transmitted light uniformly by a small amount – usually about 25%.
The advertising implication is that “the moon is so bright that looking at it through a telescope will hurt your eyes”.
No it won’t.
The moon is very bright, but it’s not that bright. It won’t hurt your eyes. It will certainly ruin your night vision, temporarily, which is a problem if you are planning to move on and try to see dimmer objects. But an easier and smarter way to handle that problem is to view the dimmer objects first, and the moon later.
If you plan to spend a lot of time viewing the moon, a moon filter might make the experience slightly more comfortable. But it’s basically a gimmick. None of my astronomer acquaintances – even some who are noted experts in lunar observation – use a moon filter. Don’t bother.
(Note: I’m not a medical professional and this is not medical advice. I can certainly imagine people with various health conditions that cause them to be bothered by bright light finding a moon filter useful. I’m talking about casual use by people in good health. The right place to get medical advice on this topic is from your doctor, not from this or any web page.)
Coloured “Planetary” filters
Plain coloured filters are described as “planetary filters” and are usually sold in sets of 4 to 6 colours. They are often included in “beginner’s starter kits”, combined with other filters (e.g. a moon filter), a Barlow lens, a lens brush, etc.
What do they promise?
They are claimed to improve the viewing of planets, with different colours being recommended to improve the viewing of different planets or of different features on a given planet. They work, but the effect is minor and may disappoint a beginner. It’s not magic.
How do they work?
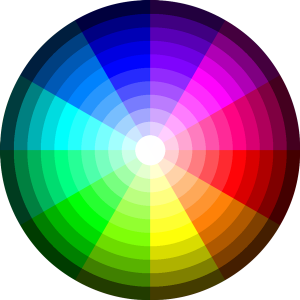 If you lay out all of the colours in the visible spectrum, and wrap the strip of colours back into a circle, you get what is called a “colour wheel”.
When light passes through a coloured filter, light the same colour as the filter is hardly affected at all. As the colour of incoming light moves away from the filter colour on the colour wheel, it is reduced more by passing through the filter, with light of the colour at the opposite side of the colour wheel from the filter colour being reduced the most.
For example, a yellow filter lets yellow light through unimpeded. Orange and green light (the colours just beside yellow on the colour wheel) are reduced slightly, and blue light (opposite side of the colour wheel) is reduced a great deal. That’s why, in the olden days of black-and-white film photography, it was a common technique to take landscape photos through a yellow or orange filter – it darkened the blue of the sky, making it more dramatic, especially if there were scattered white clouds.
Of course, a coloured filter also imposes an artificial colour cast on your view. But colouring the view is not the point of the filter; darkening the colours opposite the filter on the colour wheel is the point. On the easily-viewed planets (Saturn, Jupiter, Mars) some of the features are different colours than the background, so carefully-selected coloured filters can increase the contrast between the feature of interest and the background.
If you’re going to make much use of coloured filters, it’s worth having a colour wheel to help you remember what colours are blocked by your filters. Click on this one to enlarge it, and print it on a colour printer.
Examples
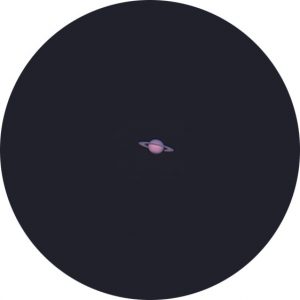
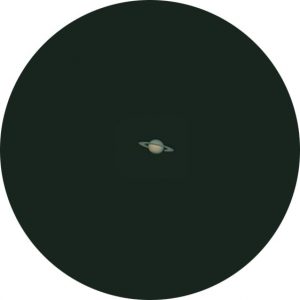
Let’s use Saturn as an example of some of the effects coloured filters can have. This is what it might look like in a typical amateur telescope on a night of excellent seeing, when a good steady view is obtained at moderately-high magnification.
Notice that there is structure visible – bands of colour both in the rings and on the cloud surface of the main body of the planet. The bands are slightly different colours – ranging from yellow, through pink, to a slightly violet shade.
Is there a way to make those bands stand out from each other more? Well, since they are different colours, we would expect coloured filters to affect them differently.
Some of the bands are yellowish, so a yellow filter should make them stand out against any feature that is any other colour.
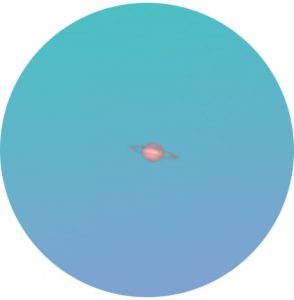
This is a simulation of the same view of Saturn viewed through a yellow eyepiece filter. Sure enough, the yellow bands aren’t affected much, while the other parts of the planet (e.g. the top portion above the rings) are slightly darkened.
The large band south of the equator is now slightly easier to see..
Some of the areas seem to have a slightly blueish tinge, so maybe a blue filter?
In this simulation, a blue filter has left the blue areas alone, but slightly darkened the yellow bands. I think that made things worse, not better – it’s now harder to distinguish the yellow and blue bands.
Perhaps a filter in between?
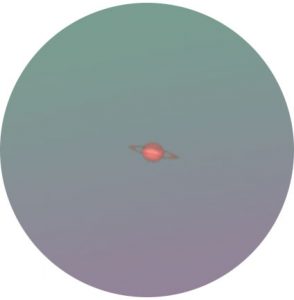
In this simulation, we are viewing through a green filter. It has darkened the orange- and blue- tinted bands by different amounts and, I think, produces the best view. The south-hemisphere band is easier to see, as with the yellow filter, but the largest dark division in the rings is also more visible.
While these are simulations (since we need to show how your eye reacts to filters, not what a camera would do), they are quite realistic. The effect is very subtle and, in my opinion, not worth the bother except in rare ideal circumstances.
One example of such rare circumstances was a public demonstration on International Astronomy Day a few years ago. We were set up outside for solar observing but, on a whim, I used my Go-To mount to find Saturn in the daytime sky. It was a very impressive demo to show people that planets are visible in the daytime if only you can find them.
To be honest, however, the view wasn’t all that good. Saturn was a very dim yellow object, difficult to see against the brilliant blue sky background. This simulation doesn’t really capture how hard it was to make it out, but gives a general idea.
Light pollution reduction filters
What do they promise?
Light pollution reduction (LPR) filters (also known as Light pollution filters, broadband filters and skyglow filters) certainly have the name that holds the most promise for the amateur observer. After all, most beginners are observing from light-polluted suburbs, and quickly learn how much that light pollution limits what they can see. Who wouldn’t want a filter to eliminate the light pollution, allowing you views from the city that rival those in a dark-sky location?
Sorry. To repeat a common theme in this article, LPR filters do work, but the effect is very subtle and will disappoint you if you are expecting miracles. They are not magic.
How do they work?
LPR filters are broadband filters: they let most light through with minimal interference, but reduce light of certain narrowly-defined colours.
The reason that is a useful thing to do is that most urban light pollution is not random light of all colours. Most urban light pollution is caused by street lighting and parking lot lighting, which is scattered around by dust and moisture in the air, producing a background glow. The good news is that most street lighting is produced by energy-efficient gas fluorescent lamps, which glow in very specific colours. Most older street lighting is one of two types:
- Mercury-vapour lights, which produce the familiar blue-white light, and are very common in parking lots and on some streets; and
- Low-pressure sodium-vapour lights, gradually replacing mercury-vapour lights for street lighting, which produce a warm yellowish light.
Those two technologies for lighting produce light of well-known, narrowly-defined colours.
Most LPR filters work by allowing all light except those two colours to pass.
Of course, those colours are also diminished in whatever object you are trying to observe. But, most stars, planets, and galaxies are emitting light of all colours, so there is still plenty left after the background glow of mercury and sodium lighting is reduced.
How well do they work?
LPR filters do work. They aren’t perfect, for a variety of reasons:
- Although most light pollution is from street lighting, not all of it is. LPR filters only remove the colours they are designed for – usually mercury and sodium lighting.
- Since all light is diminished somewhat (just light pollution is diminished more) you need a fairly bright view to begin with. A filter does not make your target brighter – it makes the unwanted noise dimmer.
- So, such filters are more effective on larger telescopes. Small scopes may not produce a bright enough image for the target to survive the slight reduction in brightness.
We can then simulate a LPR filter that reduces the mercury and sodium light by about 10%, which is typical performance.
As you can see, the result is slightly better, but not magical.
Worse: Now (as this update is added, 2017) cities are starting to convert exterior lighting to be LED (Light Emitting Diode) based, rather than gas fluorescent. LED lighting uses less energy and is nearly maintenance-free, so the incentives for cities are clear. However, LED lighting is broadband – it emits at a wide range of colour frequencies. So the Light Pollution Filters described above won’t work on them – those filters are going to become less and less effective as exterior lighting evolves, and will probably be nearly useless in a few years.
Narrowband nebula filters
A common theme for the other kinds of filters described above has been “they’re not magic”.
Let’s take a break from that theme now. Narrowband filters are magic, if only in very specific circumstances.
What’s special about nebulae?
Narrowband filters, sometimes called nebula filters, are useful only for viewing emission nebulae. That means star-forming nebulae (e.g. M42 in Orion), planetary nebulae (e.g. M27 and M57), supernova remnants (e.g. M1), etc. What those objects all have in common is that they are emitting their own light, and the source of that light is glowing gas – gas that is excited because it is hot, because it is being irradiated by a nearby star, or because it is undergoing a shockwave due to some kind of recent event such as an explosion.
How do narrowband filters work?
Narrowband, or nebula, filters, block all light except one or two specific frequencies. Examples include:
- Hydrogen-alpha filters block all light except the 656.28 nm wavelength of Hydrogen-alpha.
- O-III filters block all light except the 500.7 nm wavelength of O-III.
- Some other narrowband filters block all light except Hydrogen-Alpha and O-III, allowing both of those to pass.
How well do they work?
When used on emission nebulae, which are producing their own light in the above wavelengths, these filters produce astonishing results. Light pollution and sky-glow will disappear, allowing the nebula to stand out very prominently.
Warnings and disclaimers
A few warnings are appropriate here, to avoid disappointment:
- Most importantly, these filters work only for emission nebulae. They will not have the same effect on clusters, planets, or galaxies (in fact they will make all of those views worse).
- These filters require a moderate amount of aperture to generate enough light to work with. They will make the view in a moderate-to-large sized scope better. They will not make a small scope behave like a large one.
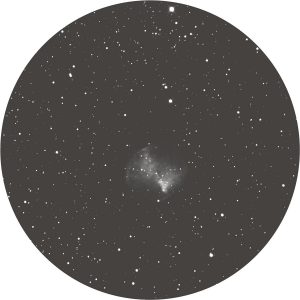
Finally, did you wonder why, when using a filter designed to pass only a specific wavelength of red light, the nebula shown in the example above isn’t red? That’s because the light, although red, is too dim to trigger the colour receptors in your eye. So although we have eliminated all but the red light, you will still perceive it as black and white. This article discusses this in more detail if you are interested.
Other considerations
As you advance in amateur astronomy, and if you have a moderately large telescope, your eyepiece collection will likely expand to include eyepieces with both 1.25″ and 2″ diameter shafts. (High-quality wide-angle eyepieces are often 2″ diameter, while high-power eyepieces are often 1.25″.) Since filters screw into the back of your eyepiece, you will need to decide which size to buy. And 2″ filters are considerably more expensive than 1.25″. For me, I use filters mainly for viewing nebulae, and I tend to view those with my larger eyepieces, so 2″ narrowband filters were the right choice.
Any filter adds another layer of glass to your optical chain, and all glass affects the light passing through your system. So quality matters. It makes no sense to spend thousands of dollars on telescope and eyepieces and yet have the quality of your view determined by an el-cheapo $25 no-name filter purchased on eBay. If you’re going to use filters, get good ones.
Finally, as already mentioned, filters reduce all incoming light, and work by reducing light of different wavelengths by different amounts. You need a fair amount of aperture to get a useful effect. A filter, even a good one, will not make a toy telescope perform like a large one. (Unfortunately, owners of toy telescopes are exactly the people who often, misled by advertising, buy filters expecting magical performance improvements, and are disappointed.)
Recommendation
If you have a telescope of 150 mm6 inches or more aperture, I recommend getting a good narrowband filter (H-alpha or O-III) for viewing emission nebulae. In my opinion, no other filters produce results good enough to be worth the bother.
Important Addendum: Solar filters
We haven’t discussed solar filters, and I intend to make them the subject of a separate article.
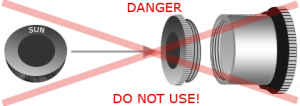 But I want to take a moment to issue a warning: some inexpensive telescopes come with a “Sun Filter” that is a very dark piece of glass that screws into the back of an eyepiece.
These are very dangerous and should never be used. The magnified heat of the sun is concentrated on the dark filter and can cause it to crack, suddenly passing the magnified sunlight through into your eye. The result will be instant and permanent blindness.
If your telescope came with one of these black screw-in “Sun Filters”, destroy it immediately before you or a loved one are injured.
I’ll expand on this in another article eventually, but: The only safe way to view the sun is with a filter at the objective end of the telescope (the far end from the eyepiece), preventing most of the solar energy from ever entering the telescope, or with a sophisticated device at the eyepiece end that rejects most of the solar energy before it hits the eyepiece.
Furthermore, the only safe solar filters are specialized devices made specifically for astronomy. No material you have around your house (not dark glass, sunglasses, soot, etc.) makes a safe solar filter.







THANK YOU VERY VERY MUCH!!!!
You have done away with all the bullshit and cut to the chase. Thank you for saving us from all these snakeoil sellers. God bless.
Any particular Ha and OIII filter that you care to recommend. Thanks again.
Best info for visual observing and filters I’ve red so far…
Thanks a lot
What an awesomely informative article this is. Thank you so much for badly needed info and assistance in considering which filters might help me in my sky travels (and which ones won’t)
Very clear, and enlightening article. I have been tempted to purchase various filters in the past. This article has pointed the way.
thank you . this has demystified the subject fro me.
Very helpful!
Thanks
thank you very much!
Alex