Objective
Balancing (synchronizing) your carburetors is part of the regular maintenance schedule of your bike. Ensuring each carburetor is sucking with equal vacuum will deliver a more balanced fuel/air mix to the four cylinders, improving performance and reducing engine “buzz”.
Required
Tools Required
- Rear stand (recommended)
- Phillips screwdrivers
- Hex keys
- Socket set
- Long-nose pliers
- Carburetor synchronization gauge
- Suitable connectors to connect carb synch gauge hoses to carb vacuum hoses. (My gauge came with little brass tubes for this job.)
- Auxiliary fuel bottle
- Tubing and connectors to connect Auxiliary fuel to bike. Include some way to shut it off for safety.
Difficulties & Warnings
- Requires a “carb synch gauge”, which is a tool that measures the vacuum in 4 rubber hoses simultaneously. Most use 4 columns of mercury; some are mechanical with springs, dials, or weights. I ordered mine from an online motorcycle specialty shop.
- Careful if you’re handling mercury. It’s highly toxic.
- This task also requires some way to feed fuel to the bike while the gas tank is not connected. You can try balancing the gas tank on a high support, but the easy way is a small separate fuel bottle that you hang from a support. You can generally get these from the same place the sync gauge is sold.
- You will be running the engine with no air filter attached, so don’t do this in an environment where there is debris or a lot of dust in the air.
- Big Warning: Once you have the gauge connected you will be working with the engine idling. Do not “rev” the engine with the vacuum gauge connected, or you may suck mercury out of the gauge and into the engine.
Procedure
First, you must:
- Warm up the engine until it will run smoothly with no choke. (You are doing this now because you are about to remove the air filter. You can postpone this if you are in a very clean environment.)
- Remove the seats
- Remove the gas tank
- Remove the airbox assembly
Then:

Hook the fuel line up to the bike somehow. Here I’ve used a commercial brass on/off valve and a short length of hose to hook it to the fuel pump, where the line from the gas tank normally goes.
If you are in a very clean environment and didn’t warm up the engine before, do it now. Remember you have no air filter, so don’t stir up dust that could get pulled into the engine.

Find the carb balancing adjustment screws. There are 3, tucked under the carbs at the rear-of-bike side. They’re just recessed phillips screws. You do not need an extra-long screwdriver to reach them, like you do on some bikes.

Find the vacuum connection points, one for each carb. Numbers 1 and 4 are hoses going nowhere, with plugs in the end (remove the plugs temporarily).

Numbers 2 and 3 are connected in a T-joint to a line from the vacuum canister. Unhook the T to access the vacuum tubes separately.

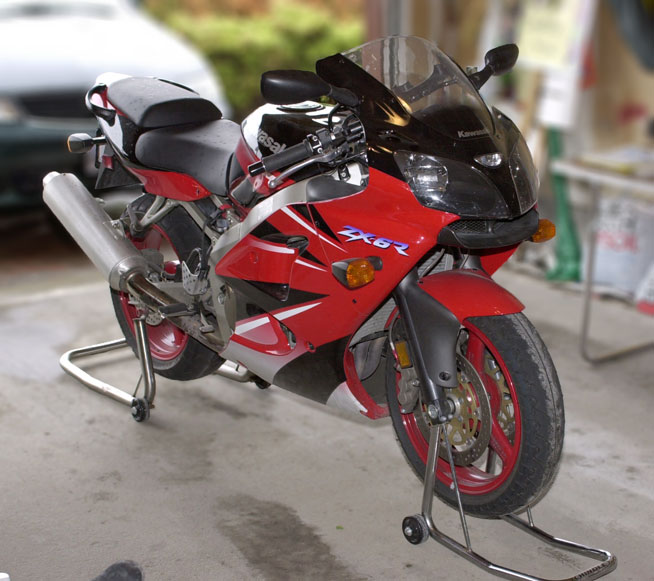
In this view from the front you can see all 4 connection points.

Connect the 4 tubes from the carb synch gauge to the 4 carbs’ vacuum tubes using the tubing that came with the gauge and any needed connectors.

Hang the gauge where you can see it easily while adjusting the carbs.

Start and idle the engine. Do not rev the engine — read the warning above.

The columns of mercury will bounce around, but you will see an average relative value easily. These 4 are not balanced.

First, adjust the balance between carbs 1 and 2.

Carefully adjust the left adjustment screw until columns 1 and 2 are equal.

Then do the right screw, equalizing columns 3 and 4. Then do the middle screw, equalizing the left two columns with the right two. Repeat until all are nicely equal. You can’t get it exact — the columns bounce around as the cylinders fire, but you’ll see the average easily.
Sorry, I forgot to take a photo of the final balanced reading, but this is pretty close.

That’s it, reassemble everything and you’re done. Be careful with the gas. Don’t forget to put the plugs back into the vacuum hoses from carbs 1 and 4, or to reassemble the T-joint for 2 and 3.
Really made the job so easy.
Sangat berguna sekali
superb it’s exactly way it should b done.
One quick tip. If you are trying to sync it and it get stuck where it revs high and never drops, your in trouble. Take the carbs off and bench sync them and then start from there. Happened to me and boy was did it scare me at first, but I remembered about bench syncing and it saved me from having to trailer my bike to a shop. Anyways….
Happy riding 😁
Brilliantly detailed set up and adjustments of my carbs on my Ninja zx6r … pulls like a train again thank you so much .
Brilliant Richard, attempting today hopefully. Could not have asked for a better write-up! Thank you very much!
couldn,t have done it with out you. you saved me over $300.00 everything works great thanks. *****
some manometers(fancy name for this tool) require you to calibrate it first, take the plug out of the line for first carb and attach the lines from the manometer 1 ata time and run the engine then adjust the screws so that tube on the gauge reads the same when attached to carb, now that you have the guage synched to itself connected it to all 4 lines and adjust the carbs as needed,…..some guages are self adjust just make sure you read the direction that come with it to see it you need to zero it first
Thank you so much for this detailed step by step guide I think I can actually attempt this job alone because of you!&|60;:)
This method applies to most carb bikes I’ve come across and have followed it to do both my previous ZX6R and now my Yamaha FZ1 (2003 model, last of the carb models) and I’ve found it to be an easy reliable, detailed way of doing the job. Thanks Richard for taking the time to post this. Excellent piece of work
Great step by step guide, Look forward to having a bash on my 636. Thanx Richard.